Site Tracking connects your enrollment and university advancement processes to your website activity by tracking webpage visits made by contacts in "real-time."
In this article:
How to set up Site Tracking
Before you start, make sure to review the "Overview of Site Tracking" help article to understand how site tracking works and how contacts are identified.
In this section, you'll learn how to enable site tracking and whitelist your domain.
- Click "Settings" in the left menu.
- The "Settings" menu will expand. Click the "Tracking" option.
- Under Site Tracking, click the "Enable" toggle to set it to the "On" position.
- In the “Whitelist and Install Code” section of the page, type your website URL (excluding the “http://") into the "Add Website URL" field.
- Then click the "Add" button.
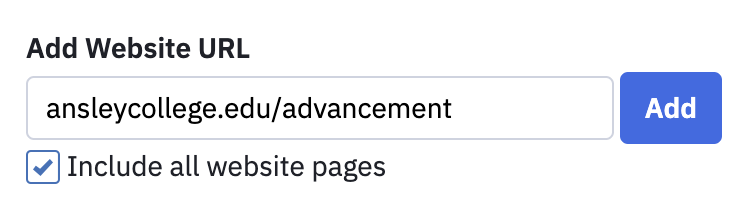
The "Include all website pages" will be selected by default. This will whitelist each page on your submitted domains. If you want to whitelist a single page or subdomain, type the specific URL of that page into the "Add Website URL" field.
Next, untick the "Include all website pages" box, then click the "Add" button.
Follow steps 4 and 5 above to add each domain (you can include multiple website domains) and subdomain you wish to use with Site Tracking.
Note that you are not required to include the "www" in the URL to whitelist the domain.
When you click the "Add" button, the domain you entered will be listed on the "Website URL" section of the tracking page:
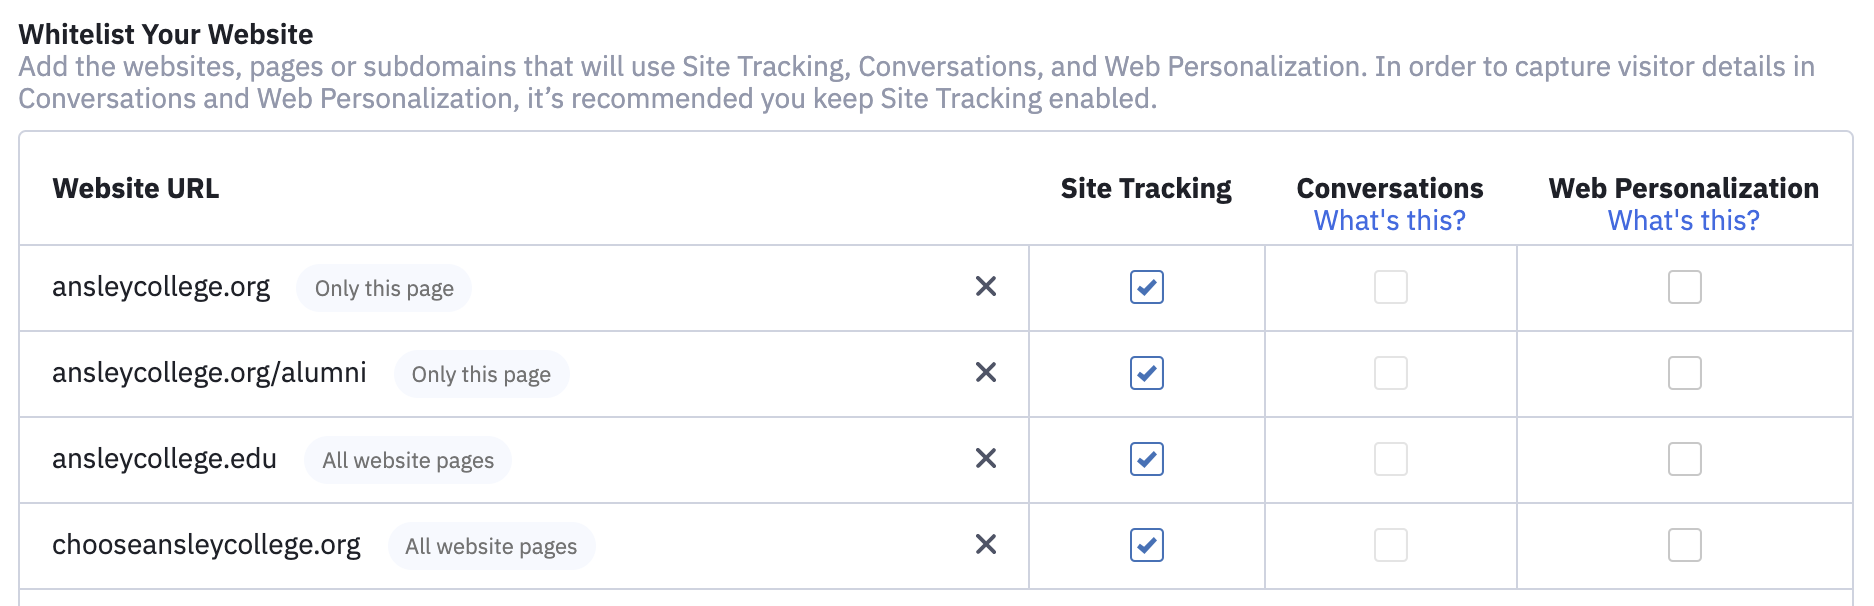
- Site Tracking
This means that we'll track visits made to your whitelisted URL once the tracking code is installed. - Conversations
This means that the Conversations chat widget will appear on each page with the site tracking code installed. Note that to add the chat widget to your website, you will need to enable Conversations.
How to install Site Tracking code
To install Site Tracking code on your site, click the "Tracking Code" box located on the Settings > Tracking page and copy it to your clipboard.
Press Control + c (Command + C on a Mac) to copy the code to your clipboard.
Press Control + v (Command + v on a Mac) to paste the code into your website.

Next, paste the site tracking code into the footer of your of each page on your website that you want to track.
We recommend placing the code in the footer because this is the easiest way of having site tracking work on all pages.
However, you will need to review the documentation provided by your Content Management System (CMS) to ensure the placement of the code is correct. In addition, they may provide a solution that allows you only to paste the code once and have it display on all pages.