The eduPostal Template Proofer is a powerful tool to generate a direct mail template proof before finalizing your creative. Unlike traditional proofing processes that take days or weeks to complete, the eduPostal Template Proofer gives you instant access to multiple digital proofs with either your data or sample data.
What Is A Direct Mail Proof?
A direct mail proof is a preliminary copy of your direct mail piece used to ensure that the designer of a direct mail piece and the printer/mailer of that piece agree on the desired outcome before it is sent into production.
What Purpose Does The Proofer Serve?
The eduPostal Direct Mail Template Proofer is your tool to merge contact data with your template and create PDF’s “on the fly” that are exact replicas of your final mailpieces. Use the Template Proofer to:
- Carefully review the images, text, colors, fonts and all creative elements of your template
- Review the data inserts of the address area of your template using your list or sample data
- View the Variable Data personalization inserts and pURLs with either your list or sample data
The Proofer is built into the templating system that empowers you to create direct mail postcards, bi-fold mailers, and letters in minutes. Any template must be "proofed" to be eligible for use in a campaign.
Templates that have not been proofed or have been proofed and changed are considered in "Draft" format and will not appear as selections in the Campaign Wizard.
Get A Direct Mail Template Proof In the eduPostal Editor
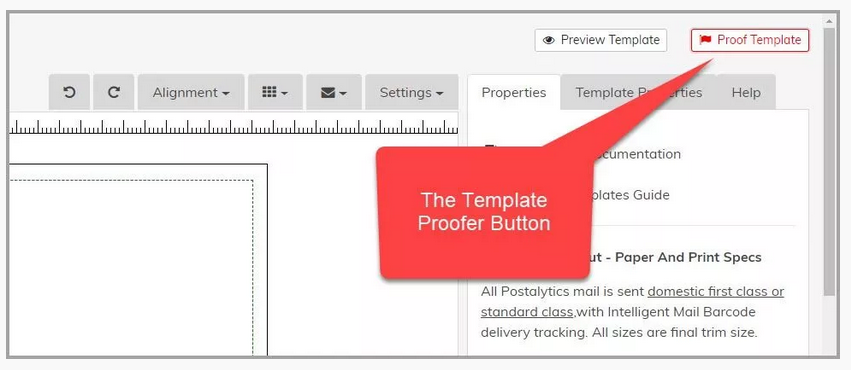
You can initiate the digital proof process in two ways:
You can select the red Proof Template button in the top right corner of the editor:
You can also start the proofer from the list of templates by clicking on the “Action” button:

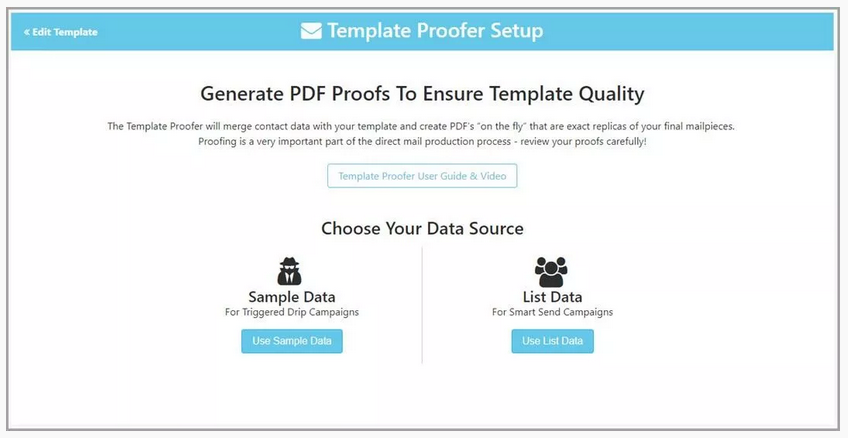
First, you’ll choose a data source to populate your addresses and any personalized Variable Data or Logic fields in your template with data. If you have a list that you plan to use in a Smart Send campaign, we recommend that you choose list data. For Triggered Drip campaigns, choose Sample Data (because there’s no list for the campaign to use):
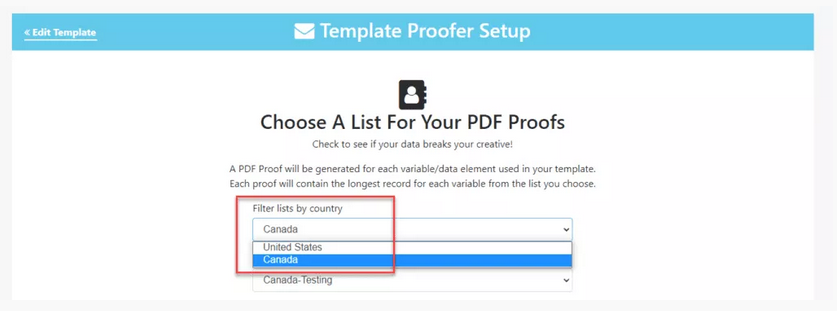
If you choose list data, you’ll be presented with two drop downs to select your list. The first drop down is to select the Country – choose either United States or Canada:
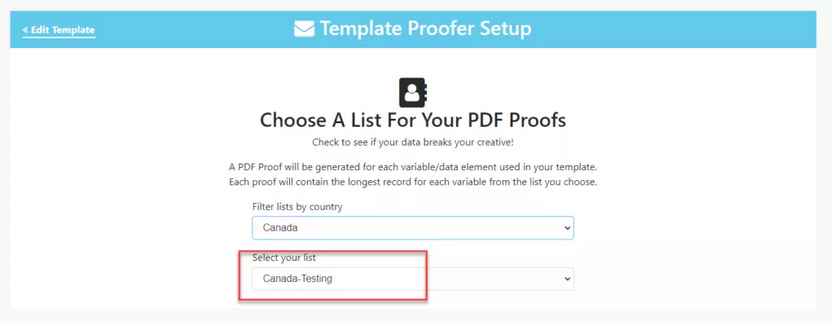
Next, choose the list:
After you choose your data source, you can choose to add any Return Address into the Proofer. The default information is pulled from the eduPostal profile:

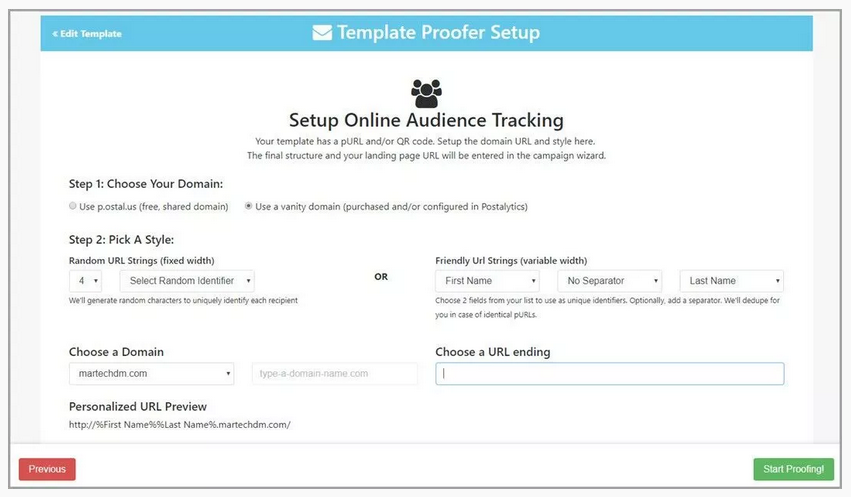
If Your Template Has The % pURL % Variable and/or QR Code – Setup pURL
If you want to activate the online tracking features of eduPostal, you’ll need to include the % pURL % variable and/or the eduPostal generated QR Code in your template. Templates that have this variable will have this step associated with the proofer:
When selecting to proof with your data, a window will appear with steps to build a personalized URL(pURL) that will populate in the proof to preview how it will look.
Note: If you upload your own QR Code, this step will not appear and you won’t activate the online tracking in eduPostal.
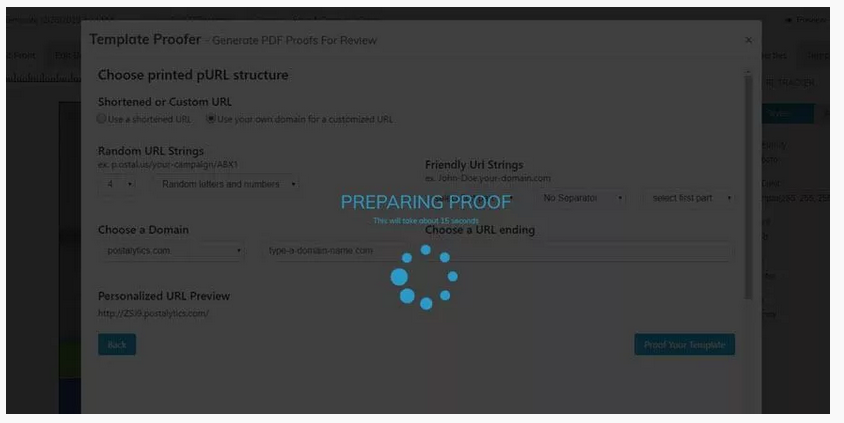
Wait for Proof to Generate
The editor now prepares your proof for viewing. This allows you to see the variable fields populated and download the proof for closer viewing.
Closely Inspect Your PDF – Toggle Through Multiple Versions
eduPostal will present to your a high resolution PDF that you should review carefully before moving on. If you’ve used a list to create the proof, data from the list will be used to fill any variable data fields that you’ve used in your creative. You can toggle through multiple proofs to see the impact of the longest names, addresses and other variables on your creative.

If you’d like to share the proof you can click the download or print buttons in the PDF.
Proof Quality Checks – Confirm Everything Is Correct or Return To The Editor To Fix
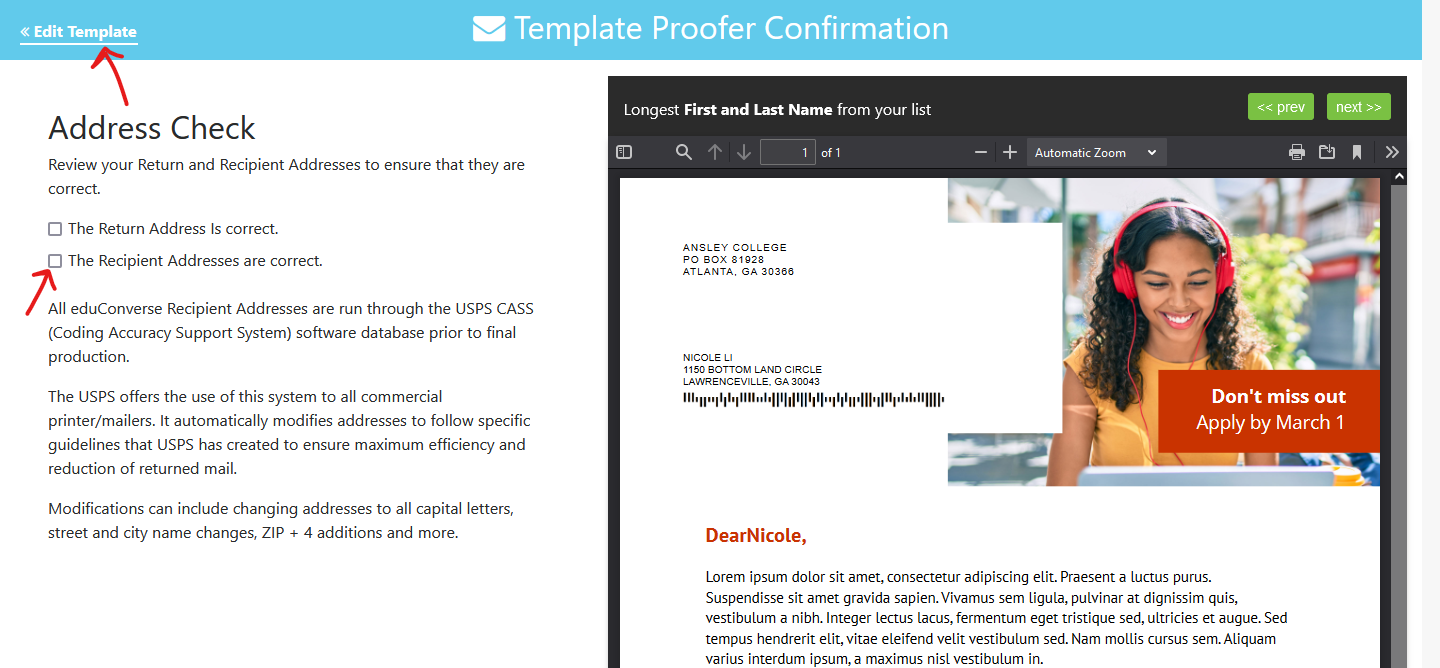
The final steps of the proofer will ask you to carefully review all of the elements of your creative, prior to accepting the final proof. At each step, you’ll be presented with information about your template, and you’ll need to check off that the proof looks correct to move forward. It is important to review this information carefully, and if something looks off, return to the editor and modify the template.
The steps and confirmations include:
- Image Quality Check – review all images for clarity
- Safe & Bleed Area Check – make sure nothing gets cut off during the printing process
- Copy, Spelling & Formatting Check – you’d be surprised how often another check will find small errors
- Address Check – make sure the “From” and “To” Addresses are correctly being rendered
- Personalization Check – make sure that Variable Data, Logic and pURLs are rendering properly
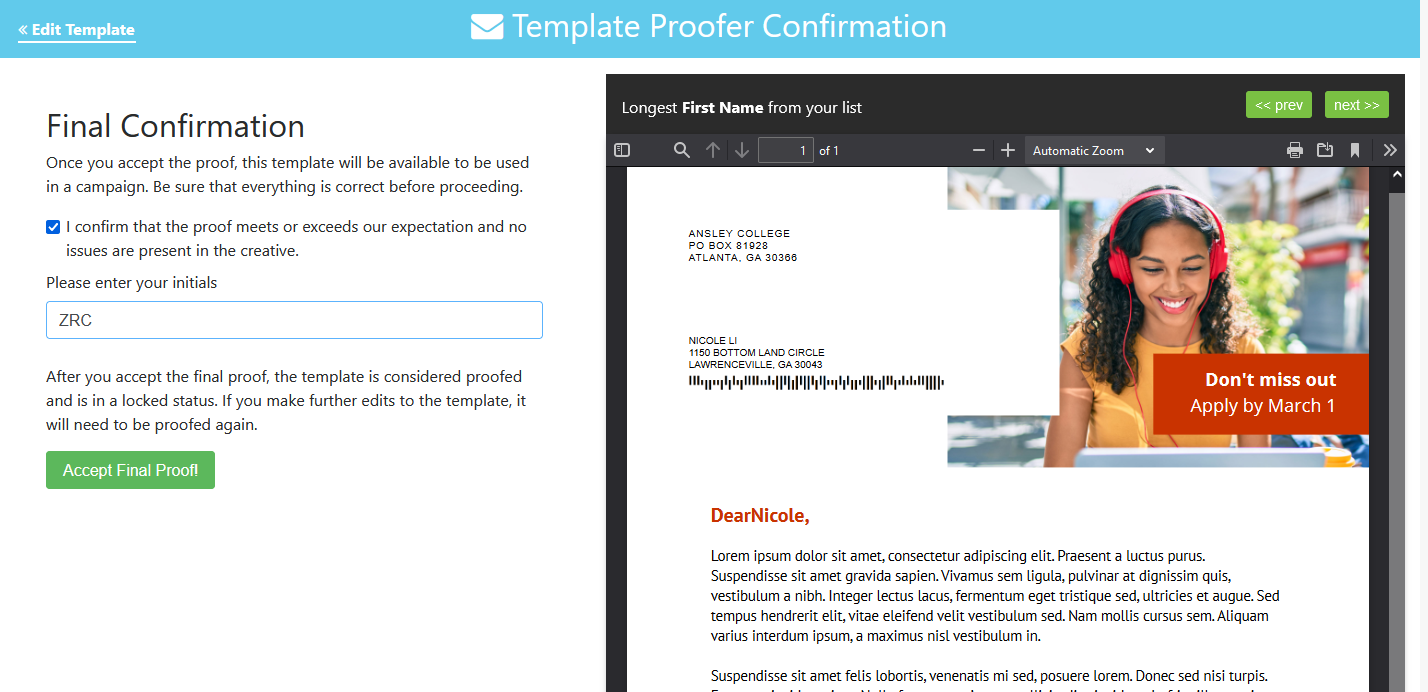
The final step will ask you to confirm that the proof meets or exceeds your expectations and for your to enter your initials before selecting Accept Final Proof.
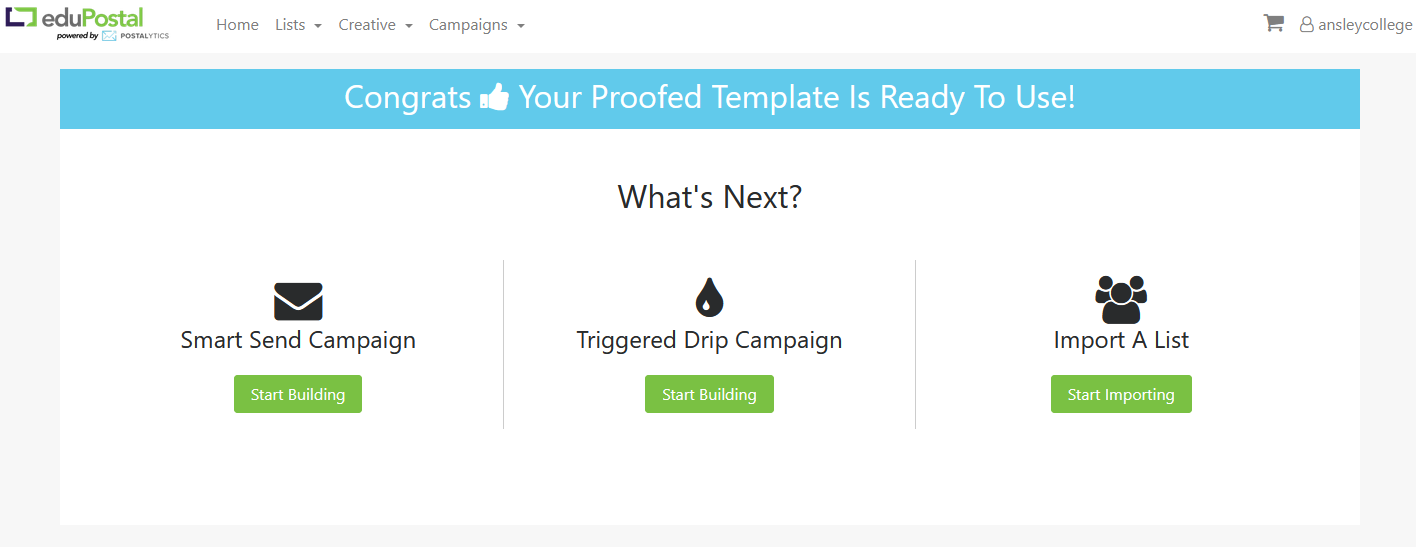
Template is Now Ready to be Used in a Campaign
After selecting Accept Final Proof, you’ll be presented with some quick links to build a campaign or upload a list.
On the View Templates page you will now see a green check mark under the Proof column. Your direct mail template proof has been accepted, and you can proceed with a campaign using the template.

In addition, your finished template will appear when going through the steps of Creating a Campaign.
Once the direct mail piece is "proofed," the mailer is eligible to send in a Smart Send or Triggered Drip campaign.