Setting up Your Payment Account and Products
1. On the Form Builder page, click the Add Form Element button, go to the Payments tab, then select PayPal Personal.
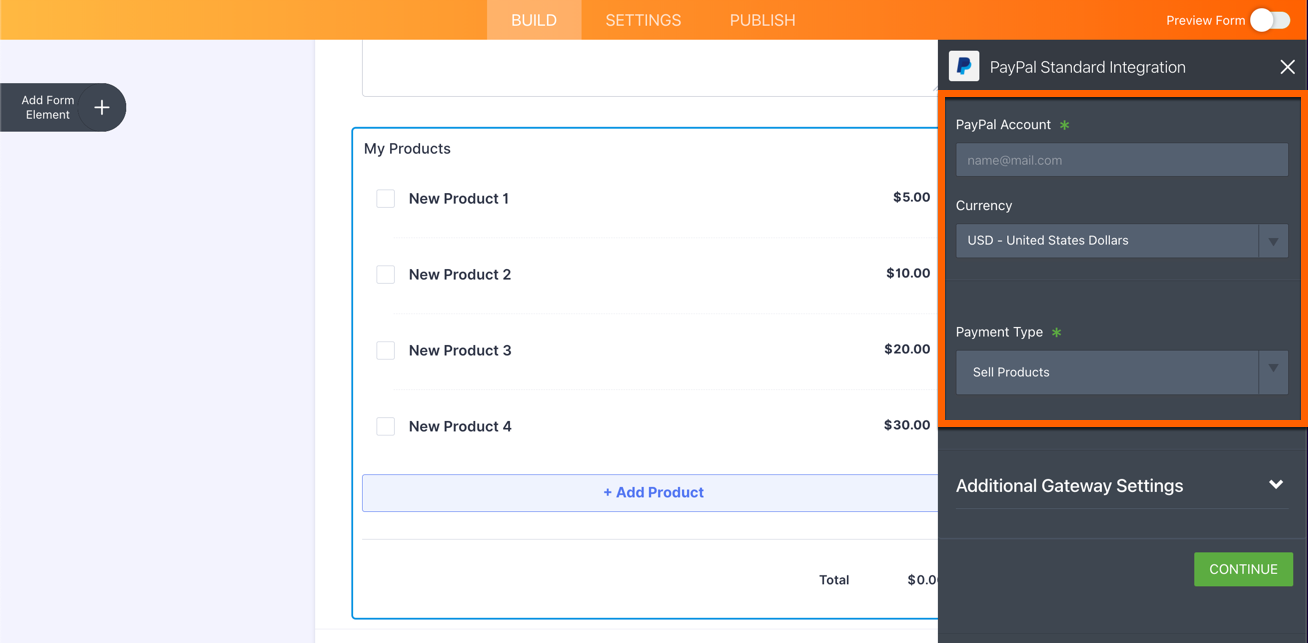
2. Enter your PayPal account email address, Currency, and select your Payment Type. In this example, we’ll choose Sell Products.
3. Optionally, expand the Additional Gateway Settings section. Under this section, you can find additional settings for your payment getaway:
- Users Can Select Multiple Products – select “Yes” if you want users to be able to select multiple products.
- Show Total Price on the Form – select “Yes” if you want to show the total amount on the form.
- Sandbox Mode – the PayPal Sandbox is a self-contained, virtual testing environment that mimics the live PayPal production environment. It provides a shielded space where you can initiate and watch your application process the requests you make to the PayPal APIs without touching any live PayPal accounts.
- Authorization Only – enable this option if you want to collect orders and charge customers at a later date.
- Require Shipment Address – if you’ll be shipping a product to the user or need an address for some other purpose, select “Yes”.
- Checkout Language – select the language to be used on your checkout page.
- IPN Relay URL – allows you to send the IPN data from PayPal to your own URL. For more information, please check the FAQ: PayPal Incomplete Payments.
- Pending Payment Email – this option allows you to send an email to customers who fail to submit their payment on time.
- Clickable Image Preview – enable this option to open product images in a lightbox window.
- Use Decimals – this is enabled by default. Select “No” if you don’t want to use decimals.
- Decimal Separator – you can choose to use decimal points or commas.
- Redirected PayPal Page Style – to learn more about this, see this page from PayPal: https://www.paypal.com/customize.
- Checkout Logo – you can elect to display your custom logo on the checkout page. The image you upload will replace your email address and/or merchant ID.
- Checkout Cart Color – you can designate a border color to appear around the selected product items on the checkout page. Here’s an example of the checkout logo and color.
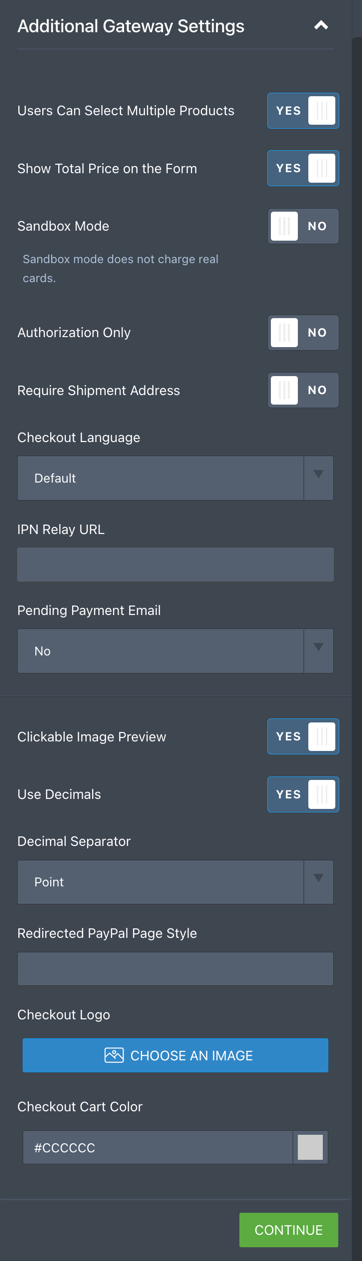
Scroll down to the bottom and hit the Continue button to save it.
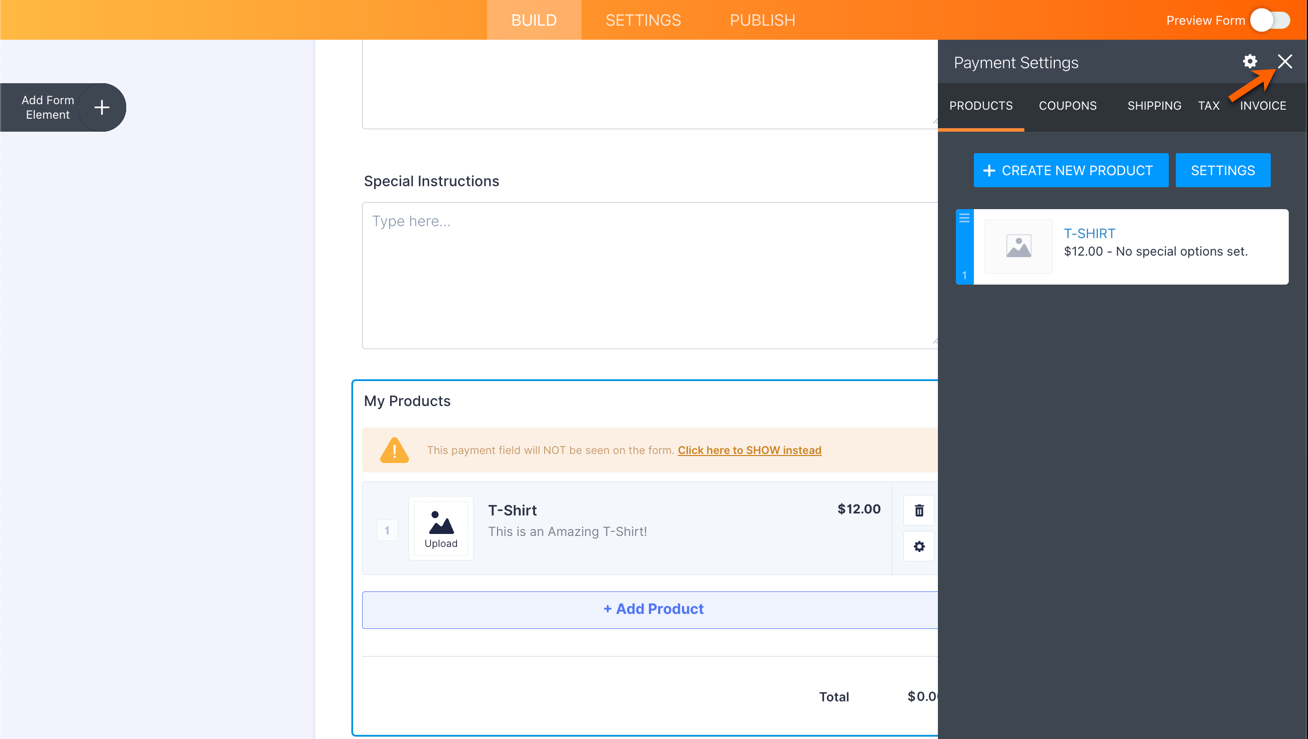
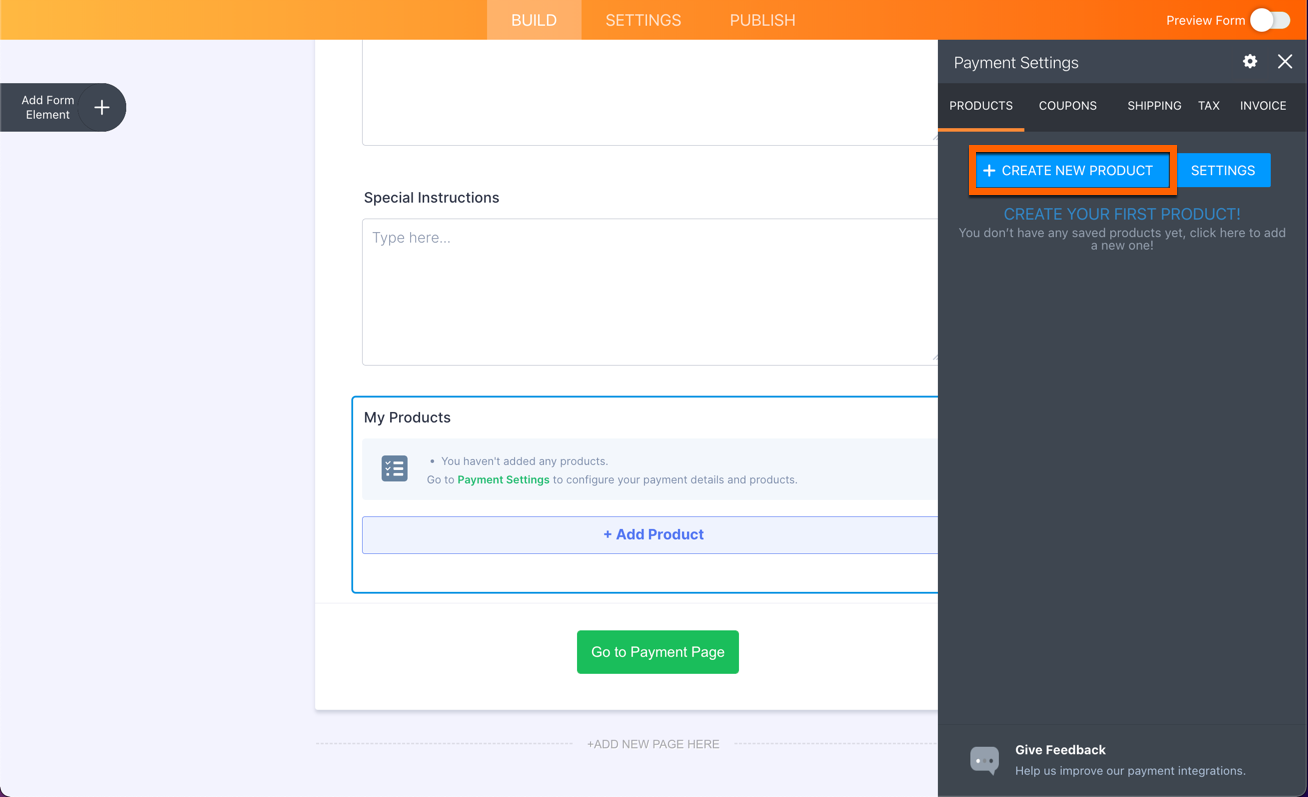
4. On the next screen, click the Create New Product button.
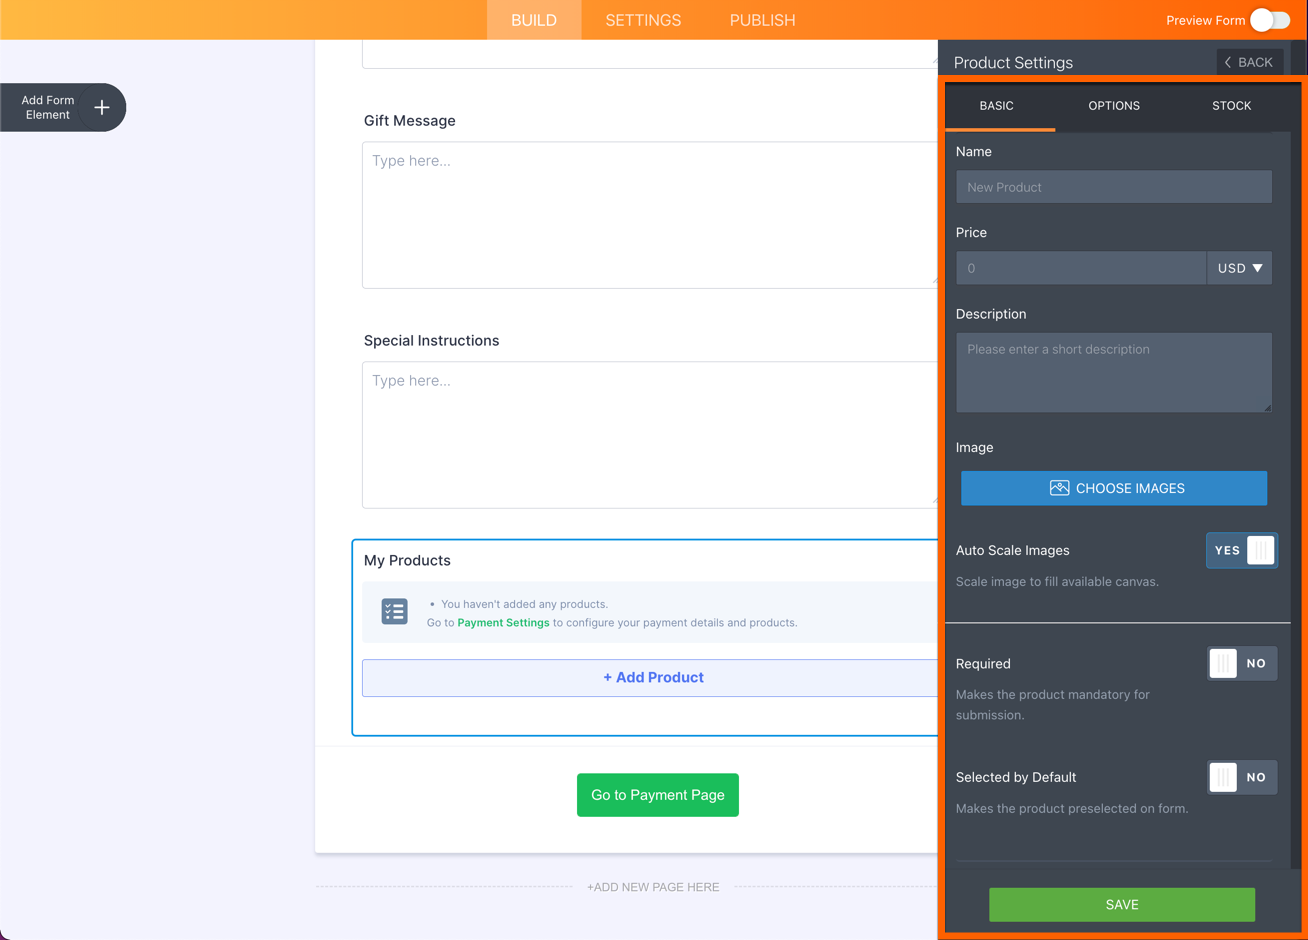
5. Add a Name for each product and a Price (with no currency symbol). Optionally, it is possible to upload or add images for your product, enter a short description, make the product required for submission or preselect it by default. When the information has been entered, click the Save button to save it.
6. Rinse and repeat steps 4 and 5 to add additional products, or click the close (X) icon at the top right to finish the payment wizard.