Message variables are a body of text that you can assign a personalization tag to for use in any campaign email.
They are similar to custom fields, but not the same: Whereas custom fields pull values from contact records, message variables pull one constant value from a single place within the platform.
This guide shows how to organize and plan for your message variables, how to create a message variable and demonstrate specific use case scenarios to help you understand how to use them in your communications.
CHAPTER 1 | Planning your Message Variables
Establishing an organizational plan for your Message Variables will save time and frustration later. Message Variables allow you to define content that could be used across your campaigns.
Consider this example.
As a best practice, your emails should be signed by real people on your campus, not "Registrar", or "Office of Admissions."
What happens if your admissions director leaves to take another job, and you hire a replacement?
If the director's "signature" is used in campaigns throughout your recruitment communications plan, you would have to track down every email and replace the former director's information with the new hire.
UNLESS you used a Message Variable for your admissions director - edit the Message Variable, and the content automatically updates across your messages!
You can use Message Variables for signatures, closes, academic programs, student life activities, donor categories, disclaimers, and more. Here's a coding structure we often use for our full-service Conversation Planning clients:
| Category |
Personalization Name |
Personalization Tag |
| 00 Academic Programs |
Undergraduate Accounting |
%00_UG_Accounting% |
| |
Professional Masters - Cybersecurity |
%00_PM_Cyber% |
| 01 Activities |
Debate |
%01_Debate% |
| |
Asian Student Organization
|
%01_AsianSO% |
| 02 Closings |
Contact Your Counselor
|
%02_Contact_Counselor% |
| |
Contact Me Counselor
|
%02_Contact_Me_Counselor% |
| 03 Signatures |
Director Admissions
|
%03_Dir_Admissions%
|
| |
Dean Professional Education
|
%03_Dean_PE%
|
| 04 Footers |
Alumni
|
%04_Alumni%
|
| |
Undergraduate applicant
|
%04_UG_Applicant%
|
| 05 Disclaimers |
Legal notice
|
%05_legal%
|
As you build out your library, developing an organized way to name your variables will save time in the future.
Tag names may be sorted ascending or descending so users can easily find the needed tag value.
Message Variables are also assigned to your lists. Therefore, you may have variables that are specific to alumni and others to students.
This should be a brief, descriptive name to help you recognize your variable. It does not have any bearing on the personalization tag.
CHAPTER 2 | Creating Message Variables
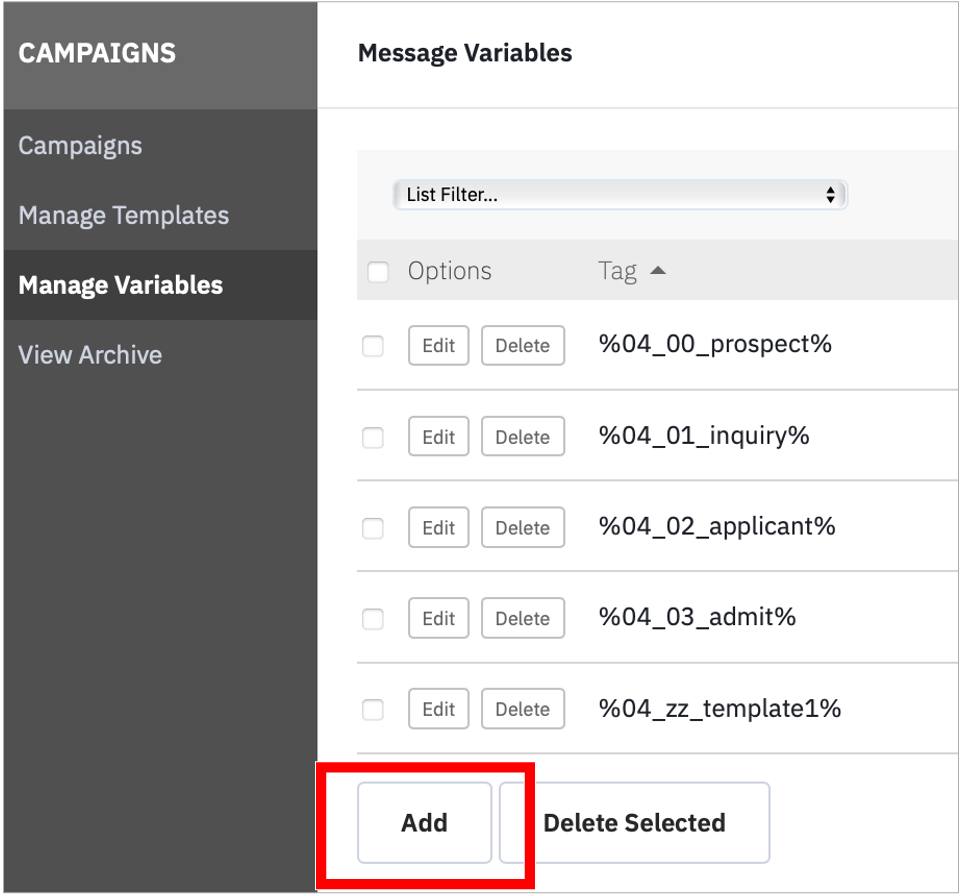
To access Message Variables, navigate to Campaigns in the left-hand menu.
Click Manage Variables and Select Add to create a new message variable.
Begin by giving it a personalization name using your naming syntax in Chapter 1 above.
Specify a personalization tag. This is the tag you will use in emails to represent your message variable. We recommend following your plan and using a shortened version of the corresponding personalization tag.
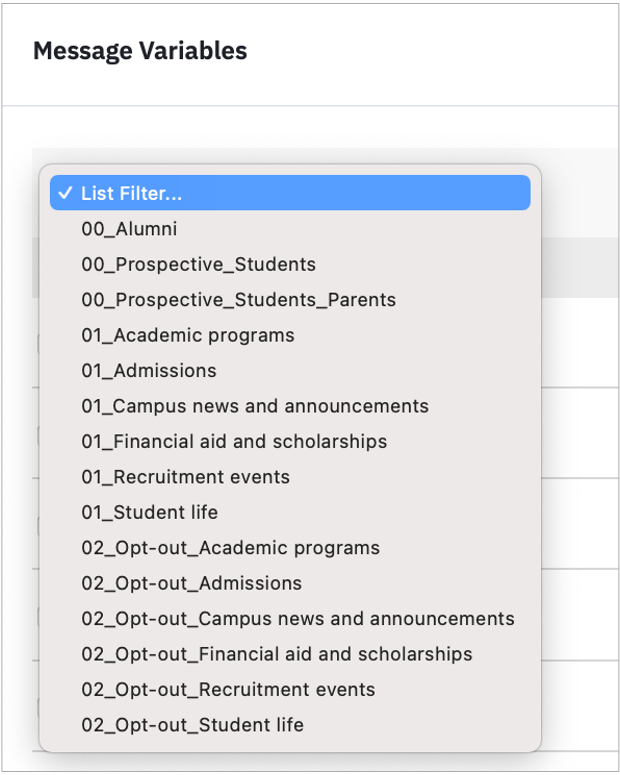
Select the list or lists to be associated with the message variable.
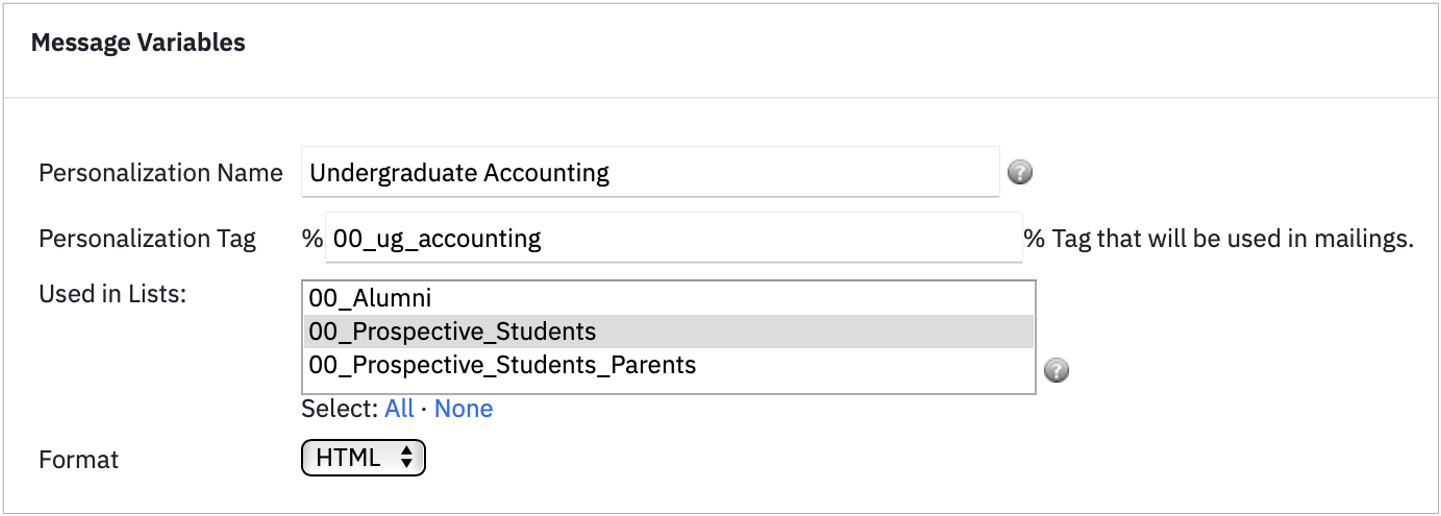 This means that your message variable will be visible only to contacts who are on the list(s) you select here. Hold the CTRL button to select multiple lists.
Note: If a message variable is used in an email and a contact receiving the email is not on the list associated with your message variable, they won’t see anything in its place. We recommend selecting all lists when you create your first message variable and deselecting lists as you become more confident.
Create your message in the Visual Editor.
In addition to text, you can add links and images. If you’re comfortable using HTML, feel free to use the Code Editor for more flexibility and advanced customization options.
Note: The text size that you use here will override whatever text size you use in the rest of your email. Make sure that you use the same font size here that you want to use in the campaign, to ensure a consistent experience for your contacts.
When you’re finished, click the Save button at the bottom to save your new message variable. You’re now ready to use it in a campaign!
Note: When you create multiple message variables, you’ll be able to see and manage them all from the Message Variables settings page:
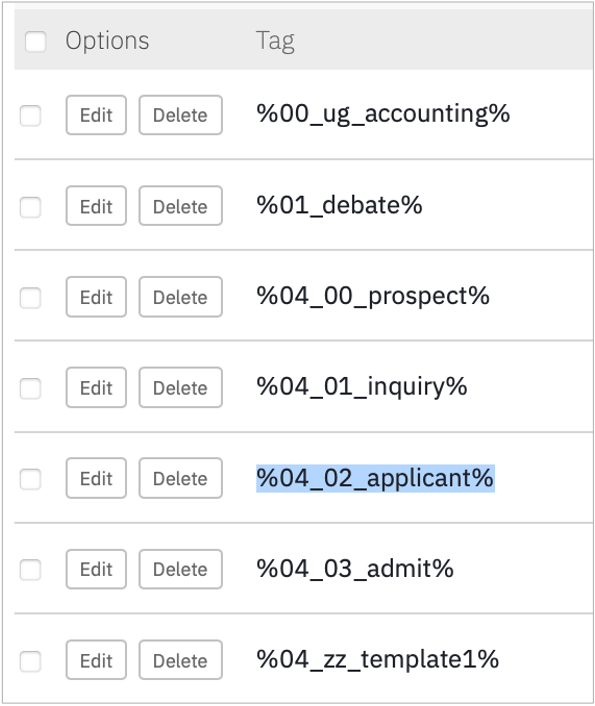
To use a select variable, simply copy the personalization tag. In this example, we will use a footer customized to prospective students who have applied for admission.
Find the applicant footer variable:
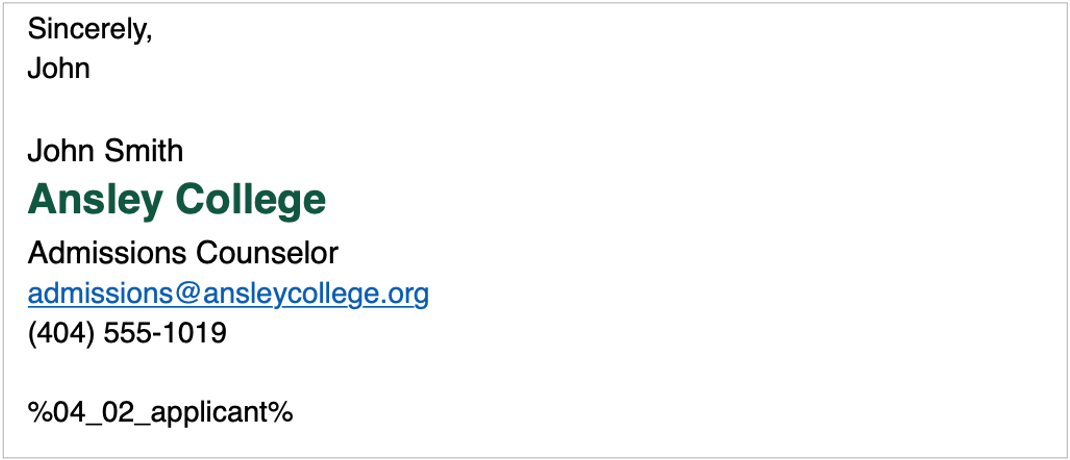
Insert the tag into a campaign message text block.
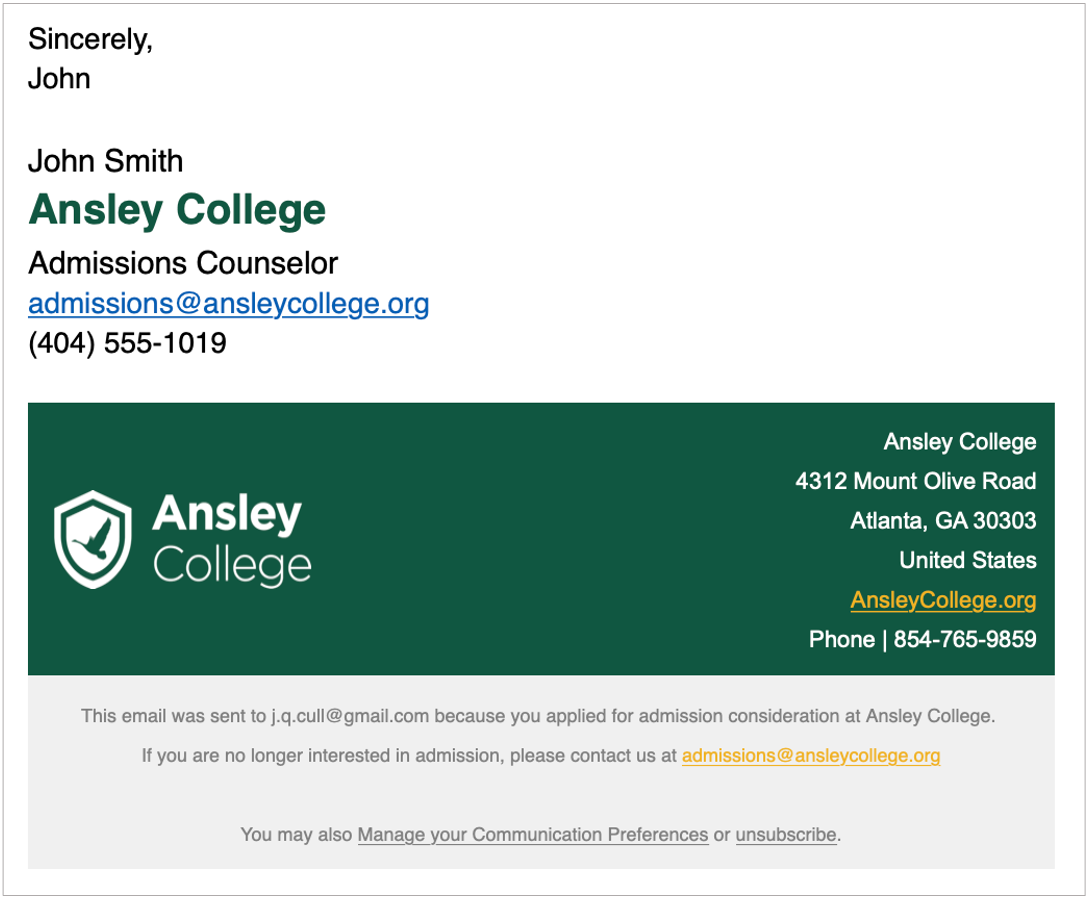
When you send your campaign, your contacts will see:
CHAPTER 3 | Use Cases for higher education
Use Case: Signatures
Creating Message Variable signatures is a primary use case that can be used across the institution.
Used in this way, a message variable allows you to make updates or signature edits from one centralized location.
Use Case: Disclaimer
Another way to use message variables is to include disclaimer information at the bottom of your email. Perhaps you run an
educational membership site and want to send your campaigns
with a disclaimer that links to the additional resources you provide for your site members, as a reminder.
CHAPTER 4 | Summary
Different from custom fields, message variables are simple yet powerful tools in your toolbox to help you further personalize your campaigns from one central location within the platform.